I love that on Pinterest you can get all sorts of DIY inspiration. On a whim last week, I suddenly had the DIY urge and I decided that I'd rope my friend
Diana in on it. She and I already had plans for the weekend and if getting crafty is awesome alone, then it is
way more awesome with a friend.
Thing is, Di isn't much of a DIY'er. She's a smarty-pants...but not the type to get her craft on. I may have scared her when I told her I was roping her in on my weekend plan. (I received an email saying "What craft?") I scanned Pinterest and
found one that I had marked that didn't require too much time or for supplies and decided this would be the one. It was perfect for a lazy Sunday.
Here's how I made my own ribbon and pearl cluster necklace
 |
| Supplies: Ribbon, Cheapy necklace(s), Scissors, Lighter, Ruler |
|
I bought 2 Opera length faux-pearl necklaces from Forever 21 ($6.80 each). I tried other discount-style stores (Five Below, Claire's, Temptations) but F21 was the cheapest. You could also buy regular 16-18inch necklaces like the Mardi Gras style beads for this too, just use more. (You could even use a spray paint and turn the cheap Mardi Gras ones into any color!)
 |
| Fold long necklaces, get length |
Once you figure out how long your necklaces are, figure out how long you want your necklace. I cut 15 inches of ribbon, I wanted to tie a bow in the back, this will make my necklace shorter from the bow...plan accordingly.
 |
| Tie ribbon to necklace. Knot tightly. Burn edges of ribbon |
Gather your necklaces and knot one side of the ribbon. Be sure to squish (why yes, that is a technical term) the ribbon in between the beads so they don't shift. Repeat on other side. (Tip: I gently brush the ribbon along a flame to melt the ends and prevent fraying. Di on the other hand, lit hers on fire by sticking her ribbon directly into the flame. Luckily, my apartment is still standing.)
 |
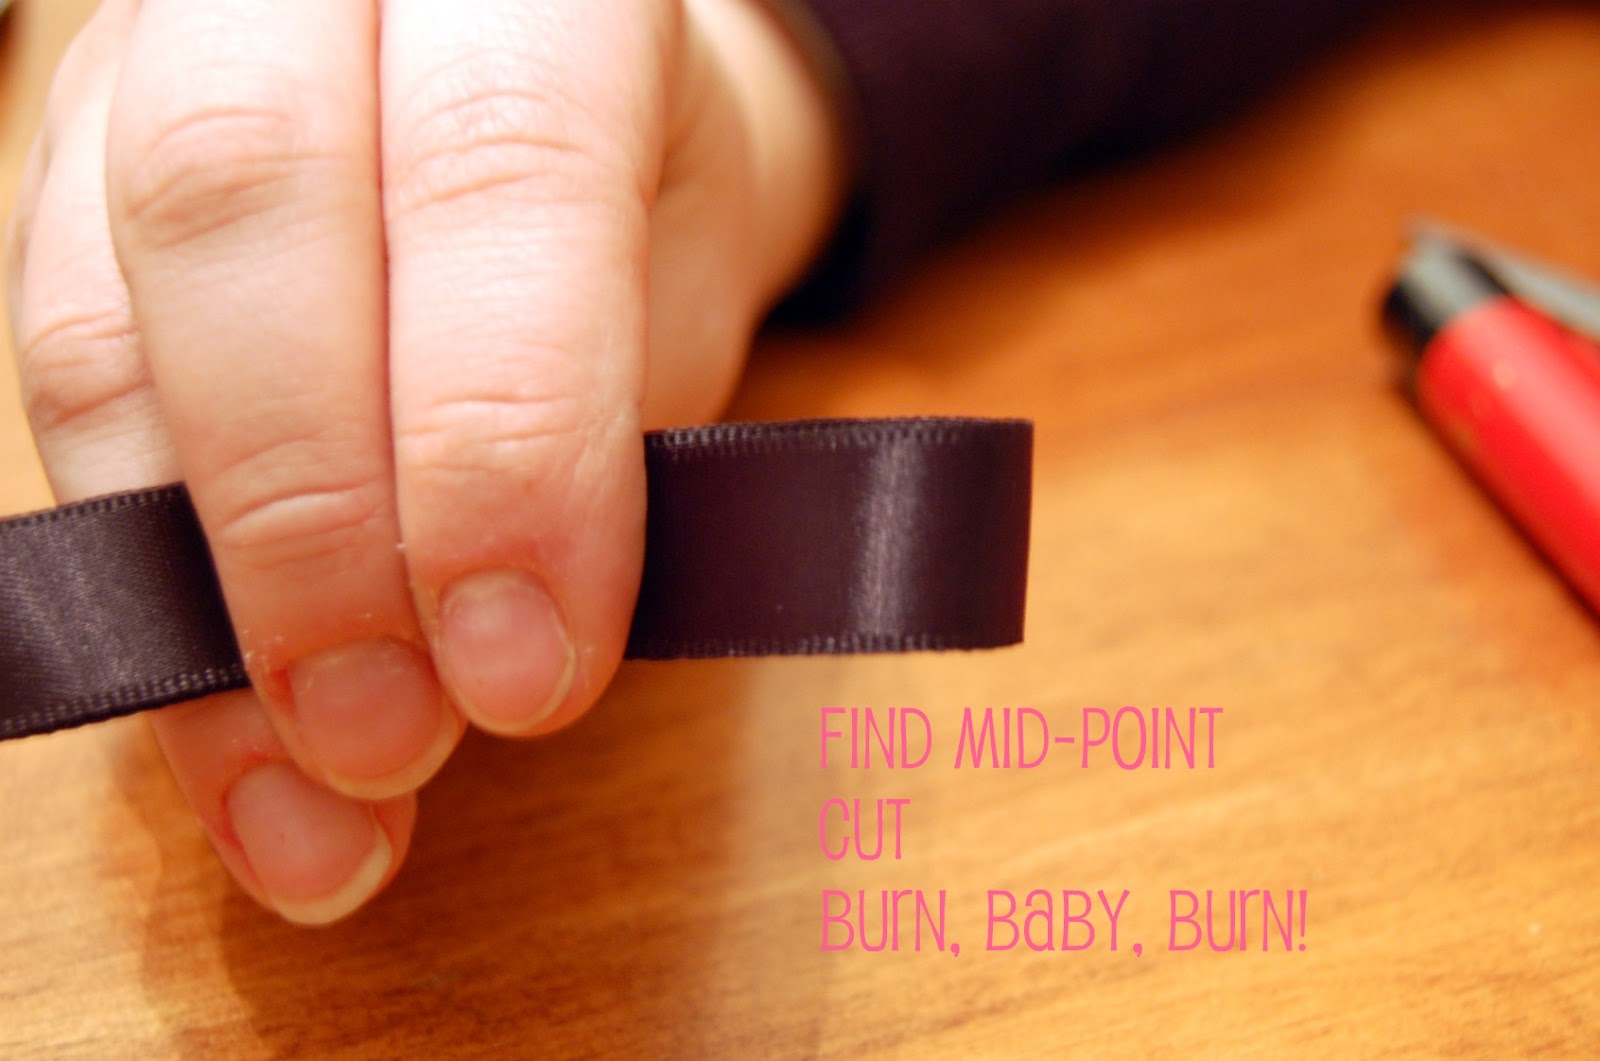
| Find mid point of ribbon, cut, burn edges again (thanks Di for holding the ribbon so I could get the picture!) |
Find the middle where you'll be cutting your ribbon, cut and again burn the edges to prevent fraying. You can skip this step for a long style, or you can cut closer to one of the sides and tie the bow there so you have that showing--just keep in mind, if that's what you do, it will be your only option for tying. Your necklace is now ready to wear!
 |
| Please pardon my deer in the headlights look, I just took this picture as I was working on this post. |
So I browsed the Internet to see if I could find some currently for sale necklaces similar to this, you know...for comparison. Here's what I found:
The Limited one is the least expensive, and has not only pearl, but chain...but still costs more than mine. My version got a ton of compliments at work, and really added a lot to my rather boring, uninspired outfit.
If you make this yourself, I'd love to see your creation!


4 comments:
I didn't MEAN to light it on fire. It just got too close. But it worked out okay, since I have ninja-like skills and blew out the flame before the whole room went up. ;)
Great post!
What a great DIY! I love that necklace!
See Me Rwar
Erin!!! Look at this! Such a perfect DIY!!! THANK you for sharing, lovely! I'll definitely be doing this. Hope you enjoy your weekend! xoxo
Yay DIY, now when we havin' our craft night?
Post a Comment