Tuesday, May 10, 2011

I Spy: DIY

I've been feeling crafty lately. I don't know what it is, but I am feeling nostalgic for the friendship bracelets of my elementary school days. Short of buying the craft store out of every color embroidery floss, I decided there has to be grown up versions out there somewhere.

Here are a few styles that I'm digging. I plan on making a trip to the hardware store this evening for the essentials. (Husband nearly died of shock when I told him I had DIY's that required s-hooks, hex nuts and ropes, but gladly agreed to accompany me.)

Etsy Sailor's knot bracelet DIY

Honestly WTF Hex nut bracelet

Honestly WTF S-hook rope bracelet
And, if all else fails, I'll just buy my weight in embroidery floss. There's just something about brightly colored rope/twine bracelets that scream carefree summers to me.

Wednesday, May 4, 2011

Why I shouldn't be left to my own devices

I've been searching for a pink case for my phone for quite some time now. Turns out, a hard case in the right shade of pink is hard to find. The other day I was walking around Michael's, I happened to pass by the acrylic paints and thought "I should just paint my case I have now!" (it was a translucent purple color). So I did. This color (Pink Peony) was named perfectly to my liking, and was the vision of pink I had in my head.

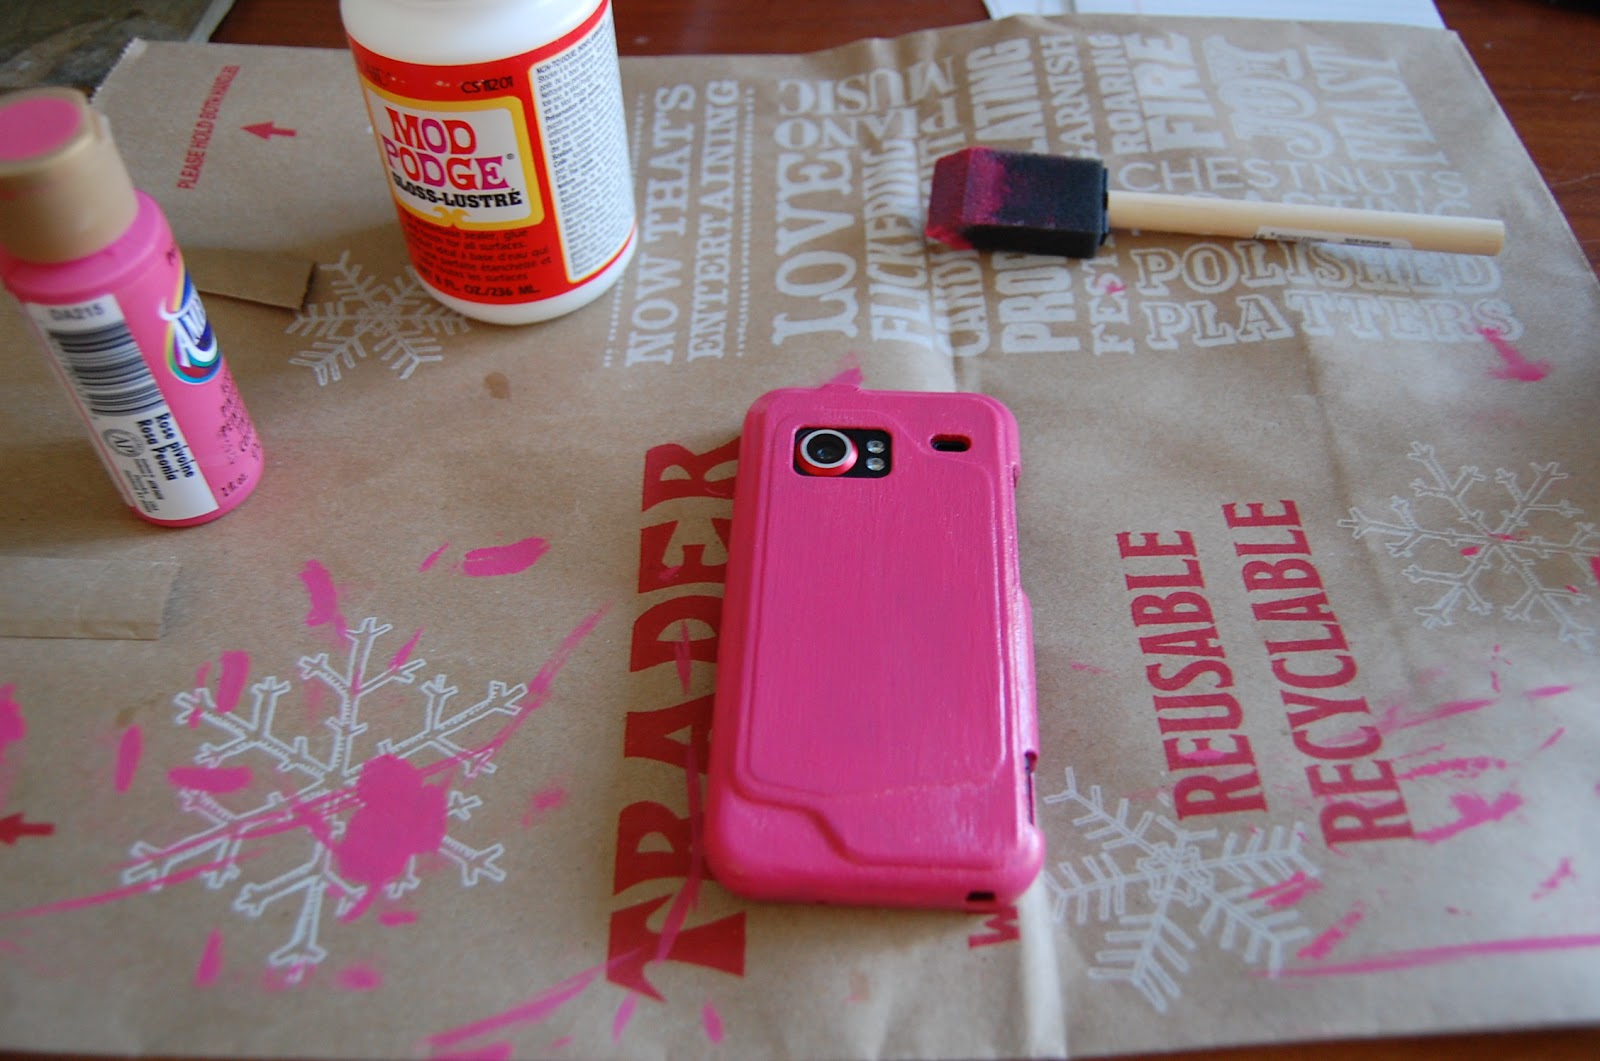
I'm not going to insult your intelligence by doing a step-by-step DIY, but essentially, I scuffed up the plastic with sandpaper, painted many many coats of the pink acrylic paint (letting it dry between each coat) and then covered it with gloss-finish Modge Podge (my crafty lover). Now, since doing this, and perhaps because I busted out the Modge Podge, I was thinking you could always stick a picture/stickers/perhaps even some lace, in between the last paint coat (applying while still tacky) and the Modge Podge. A bit of a decoupage, if you will. (I may have spent an entire summer doing this with magazines and small cardboard pencil boxes from my then employer, gifting them to friends before we all took off to college).

I did this while my husband was out, and when he came home he seemed a bit scared of my doings...however, I have to say, it's been 4 days now, and it hasn't chipped at all. I also haven't dropped it yet, so things may change if when that happens.

Friday, April 29, 2011

Oh, to be a Princess...

(source)
I really tried. I really really really tried, not to get sucked into the Royal Wedding hoopla. Honestly! Sure, I've admitted that I'm kindof sortof obsessed with Kate's style, but I was trying to avoid it. But still, despite my best efforts, I found myself disappointed this morning when I woke up and found that I missed the arrival and the vows portion of the wedding. I'm going to have to tell you all that it's not so much that it's a royal wedding that had me...it was the fact that it was a wedding. I'm obsessed with them. I will watch any show about weddings, movies where it's clearly a wedding movie, anything wedding, I'm in. I do a lot of custom jewelry orders, and my favorites are always for brides and their bridesmaids. I like talking wedding. Ever since I was 5 years old flower girl in my aunt's wedding, I was obsessed.

Although, watching the wedding this morning, I couldn't help but wonder what Jerramy Fine had to think of it all. It was pretty much her dream that happened. (The book is worth the read, I don't love chick-lit, but I could relate to some of her adventures and thoughts...maybe I shouldn't admit that, but really I am/have always known I'm a Princess, in the best way possible).

Thursday, April 7, 2011

Trend I'm Loving: Color Block style

I am loveloveloving the color block trend. I feel like I've been carrying on a romantic fling with color blocking for a few years now, and I think it's because it's clean lines and classic styling make it less of a trend and more of just a bold statement. I love punches of color, and color blocking just feeds into that.

While swooning over some color blocked clothing I thought "I should really make color block jewelry, it's so me!" Then I realized..."duh, Erin, you already are." These earrings are fun and an easy way to get into the trend. You can wear them subtly with just a white top and jeans (let the earrings make the statement) or go crazy, and add them onto a color blocked outfit (which I fully plan to do!).

View 1, 2, 3, 4 in my shop
Just so you know, this weekend I will be offering free shipping with the code "FreeShip". I hope you take advantage of it!

Wednesday, March 23, 2011

Fake it, Make it: Kate Middleton Burberry Trench

On March 8th, the classic little trench became even more of an icon. Prince William and Kate Middleton made a trip to Ireland, and Burberry sold out of it's ruffled trench coat immediately. It goes without saying there's a lot of rubber-necking happening with this royal couple and their engagement, and Kate is becoming an icon for her classic style, I can see why.

I for one, would be hard pressed to find this coat, let alone be able to guiltlessly foot the (approximately) $995 bill for it, but I saw it and fell in love. I was a girl on a mission to find a decent replica. (And, it just so happens, that a trench is on my list of jackets to replace in my closet!)

So here's the royal couple out and about in Ireland:

(source)

Here's how I'm faking it:


Modcloth ($89.99)
No ruffle, but cute skirt and has the dark accents

Banana Republic ($198)
A bit short, only in green, but has a ruffle
Victoria's Secret ($79)
Lacks structure, not a fan of the hood, but cute
Steve Madden ($79.99)
Only in green, but has a belt and tiers
Ultimately, there is no absolute replica with this, and I do appreciate that I just wish there was something a bit closer to it. I prefer the Modcloth one for it's ultra feminine skirting, but I also do like the Victoria's Secret one too. We'll have to see what happens!

Monday, March 21, 2011

DIY: Lace trim tee for cheap!

A few weeks ago, I saw this post on one of my favorite blogs, Uber Chic for Cheap. This top on Blake Lively is too cute, and my crafty mind was kicked into full gear.

Cute, no?

This past week, I had my wisdom teeth removed and I was looking for something to do the day before my extraction to keep my mind off everything to come, and this seemed like an easy DIY to do just that. From start to finish, it took me about an hour to do, and the total cost of supplies was $3.49 for a yard of lace. I used a tee I had just hanging out in my dresser, and thread and needle from my sewing kit, which I feel is pretty standard in any household. This would have been so much quicker if I owned a sewing machine. (How I still don't own one is beyond me)


You could fold this over into the inside of the tee, and secure it that way, but my
skin is a little too sensitive for that.

I just today thought that a picture of this on would be helpful to see. But, you get
me in my yoga pants and without my slightly puffy post-extraction face.
You could sew random side pieces down to help the folding away. I may do this.
This tee was in my mind for another DIY involving my dear friend RIT dye, and now I'm wondering what would happen if I just tossed the whole thing into some anyway...but these are good colors for the Spring and Summer, so we may have to wait until the Fall.

Tuesday, March 15, 2011

DIY: Silver cleaning

I have lots of silver jewelry. It comes with the business, I guess you could say. But, I also have a lot of jewelry that once belonged to my great-grandmother (I call this my "archives"). Unfortunately over time silver blackens, I try to stay on top of cleanings, but I ran out of cleaner, and suddenly cleaning my pieces fell to the wayside. One day I decided enough was enough, I was going to find a cleaner that wasn't full of harsh chemicals (as part of my personal goals from my list) and potentially with something from my cabinets. Immediately, I figured there had to be some sort of baking soda paste I could make. I browsed the interwebs and found many homemade solutions. This was the one I went with, and I have to say, it worked great! I always get nervous with cleaning my vintage jewelry with stones, but having all natural ingredients kind of sets you at ease. Natural elements together can't possibly be bad, right?

So, here's what you'll need:
  • Boiling water
  • Glass baking dish (make sure the sides are tall enough to cover your jewelry)
  • Aluminum foil
  • Baking soda
  • Tongs (or something to remove the jewelry)
  • Dry cloth/Microfiber cleaning cloth
  • About 20-30 minutes depending on the amount of silver
(Click on pictures to enlarge)


(This should say Step 6. Sorry!)
 And there you have it. After I dried my goods, I used a microfiber cloth to clean them more and bring out the shine. If you're extra adventurous, you can even use a polishing adapter on the Dremmel and really pump up the shine. I did that on the cuff with the pinkish stone on it.

Voila!