Showing posts with label DIY. Show all posts

Friday, January 20, 2012

DIY: Ribbon and Pearl Necklace

I love that on Pinterest you can get all sorts of DIY inspiration. On a whim last week, I suddenly had the DIY urge and I decided that I'd rope my friend Diana in on it. She and I already had plans for the weekend and if getting crafty is awesome alone, then it is way more awesome with a friend.

Thing is, Di isn't much of a DIY'er. She's a smarty-pants...but not the type to get her craft on. I may have scared her when I told her I was roping her in on my weekend plan. (I received an email saying "What craft?") I scanned Pinterest and found one that I had marked that didn't require too much time or for supplies and decided this would be the one. It was perfect for a lazy Sunday.

Here's how I made my own ribbon and pearl cluster necklace

Supplies: Ribbon, Cheapy necklace(s), Scissors, Lighter, Ruler
I bought 2 Opera length faux-pearl necklaces from Forever 21 ($6.80 each). I tried other discount-style stores (Five Below, Claire's, Temptations) but F21 was the cheapest. You could also buy regular 16-18inch necklaces like the Mardi Gras style beads for this too, just use more. (You could even use a spray paint and turn the cheap Mardi Gras ones into any color!)

Fold long necklaces, get length
Once you figure out how long your necklaces are, figure out how long you want your necklace. I cut 15 inches of ribbon, I wanted to tie a bow in the back, this will make my necklace shorter from the bow...plan accordingly.

Tie ribbon to necklace. Knot tightly. Burn edges of ribbon
Gather your necklaces and knot one side of the ribbon. Be sure to squish (why yes, that is a technical term) the ribbon in between the beads so they don't shift. Repeat on other side. (Tip: I gently brush the ribbon along a flame to melt the ends and prevent fraying. Di on the other hand, lit hers on fire by sticking her ribbon directly into the flame. Luckily, my apartment is still standing.)

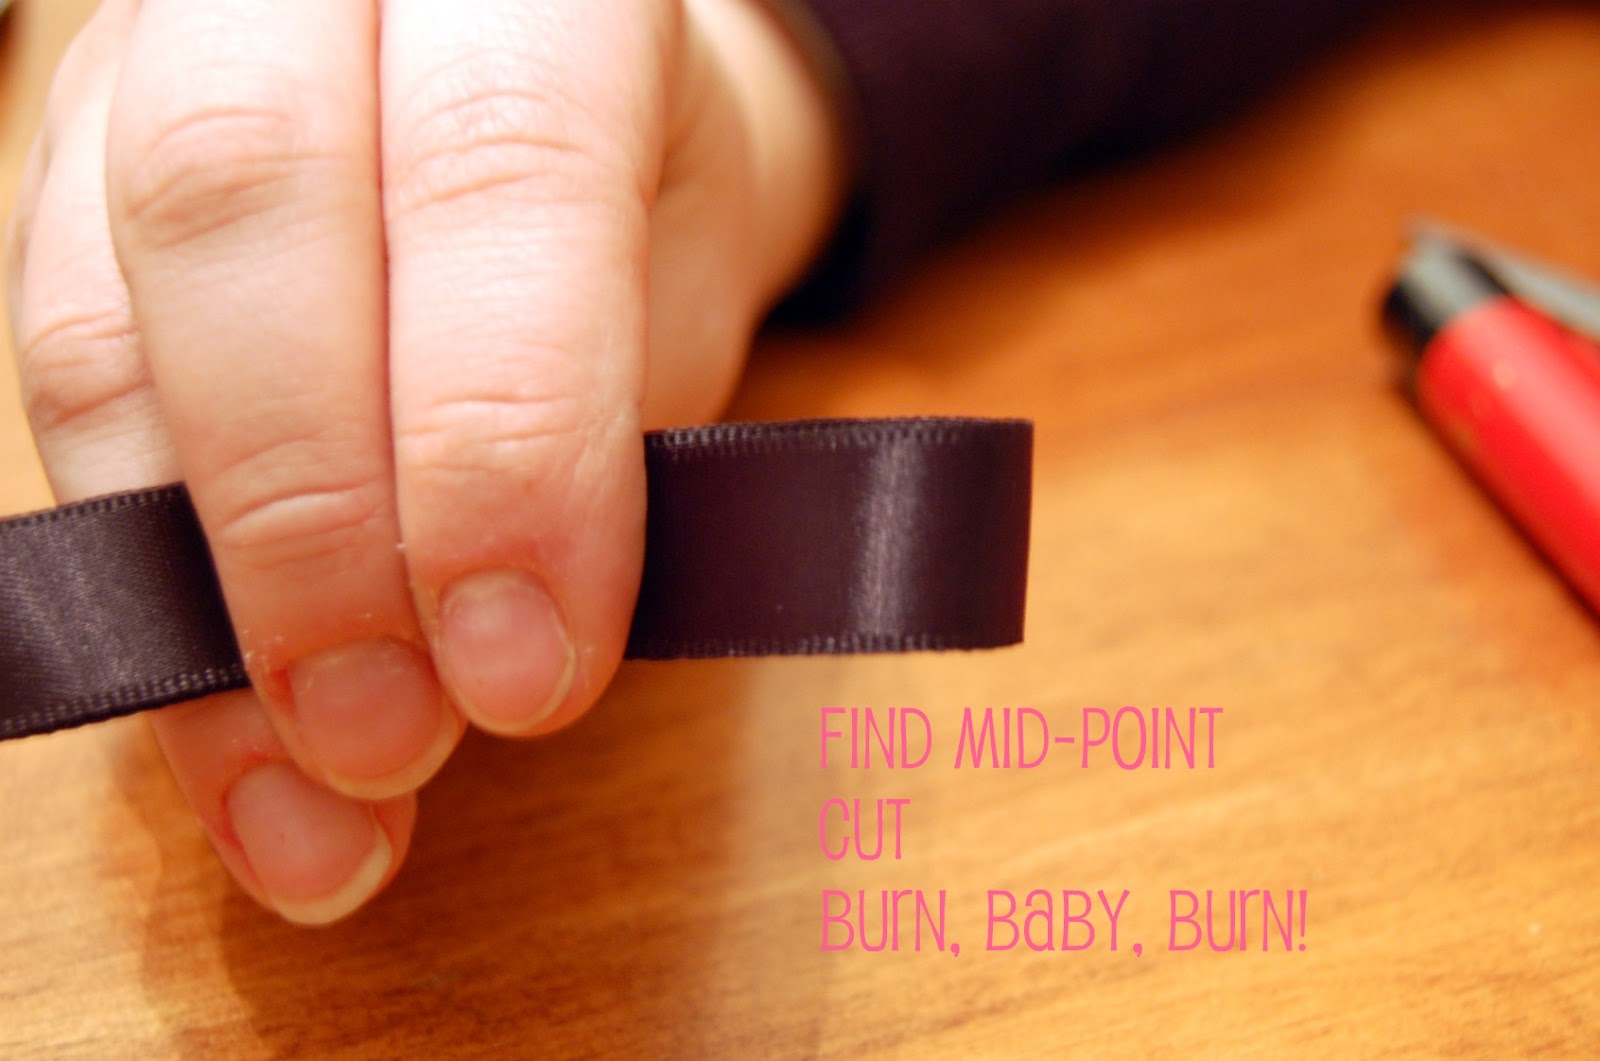
Find mid point of ribbon, cut, burn edges again (thanks Di for holding the ribbon so I could get the picture!)
Find the middle where you'll be cutting your ribbon, cut and again burn the edges to prevent fraying. You can skip this step for a long style, or you can cut closer to one of the sides and tie the bow there so you have that showing--just keep in mind, if that's what you do, it will be your only option for tying. Your necklace is now ready to wear!

Please pardon my deer in the headlights look, I just took this picture as I was working on this post.

So I browsed the Internet to see if I could find some currently for sale necklaces similar to this, you know...for comparison. Here's what I found:

Endless, Endless, Limited
The Limited one is the least expensive, and has not only pearl, but chain...but still costs more than mine. My version got a ton of compliments at work, and really added a lot to my rather boring, uninspired outfit.

If you make this yourself, I'd love to see your creation!

Monday, October 17, 2011

DIY: Bow tie necklace


I've been coming across a lot of bow tie style necklaces lately while browsing stores online. I am loving them. Bow ties are huge right now. Headbands are adorned with them, shoes are bedecked with them, and the pussybow blouse is having a moment. It was decided. I, too, would take on the bow.

The inspiration:
1. Asos 2.Max and Chloe 3. Modcloth


What you'll need:


1 Bow (I found this at JoAnne's)
Chain (to the length you want)
Clasp
4 small open jump rings (I used 3.5mm)
2 slightly larger open jump rings (I used 4mm)
1 closed jump ring (I used 5mm)
Pliers
Bead reamer (or pin/needle)
I happen to have jewelry making supplies on hand, but Michael's and other craft stores sell these supplies.
Be aware most craft stores won't have sterling silver, which is my preference. You'll most likely need to go to a beading store for sterling, or order online. 

Pierce hole on the side of your bow (for the connections).
Repeat on other side.

Open your larger jump ring. 
Using both pairs of pliers, find the seam and push/pull in opposite directions.
Place smaller jump ring on the open one.
Attach through the hole you made, close jump ring.
To close, repeat how you opened it, be sure to make sure there's no gap.
Repeat Step 2 and 3 for other side.
Measure your bow.

Based on the size of your bow, determine the amount of chain needed.
I wanted my necklace to be about 16 inches, so I cut 13 inches of chain.
Be sure to keep in mind the clasp will add some slight length as well.
Cut the chain into 2 equal lengths.

Open smaller jump ring and attach a piece of chain, then close tightly.
Repeat for other side.

On one side, attach another smaller jump ring and your clasp.
Close tightly.

On the other side, attach the smaller jump ring and the closed one.
Close tightly.

Voila!

And on. 
Please pardon my no makeup'd Sunday crafty self.

If you do this for yourself, I'd love for you to share it with me! What's your stance? To bow or not to bow? I'm excited to wear this with tees, button ups and dresses. I mean everything is classier when you're wearing a sparkling bow tie necklace, right?

Tuesday, May 10, 2011

I Spy: DIY

I've been feeling crafty lately. I don't know what it is, but I am feeling nostalgic for the friendship bracelets of my elementary school days. Short of buying the craft store out of every color embroidery floss, I decided there has to be grown up versions out there somewhere.

Here are a few styles that I'm digging. I plan on making a trip to the hardware store this evening for the essentials. (Husband nearly died of shock when I told him I had DIY's that required s-hooks, hex nuts and ropes, but gladly agreed to accompany me.)

Etsy Sailor's knot bracelet DIY

Honestly WTF Hex nut bracelet

Honestly WTF S-hook rope bracelet
And, if all else fails, I'll just buy my weight in embroidery floss. There's just something about brightly colored rope/twine bracelets that scream carefree summers to me.

Wednesday, May 4, 2011

Why I shouldn't be left to my own devices

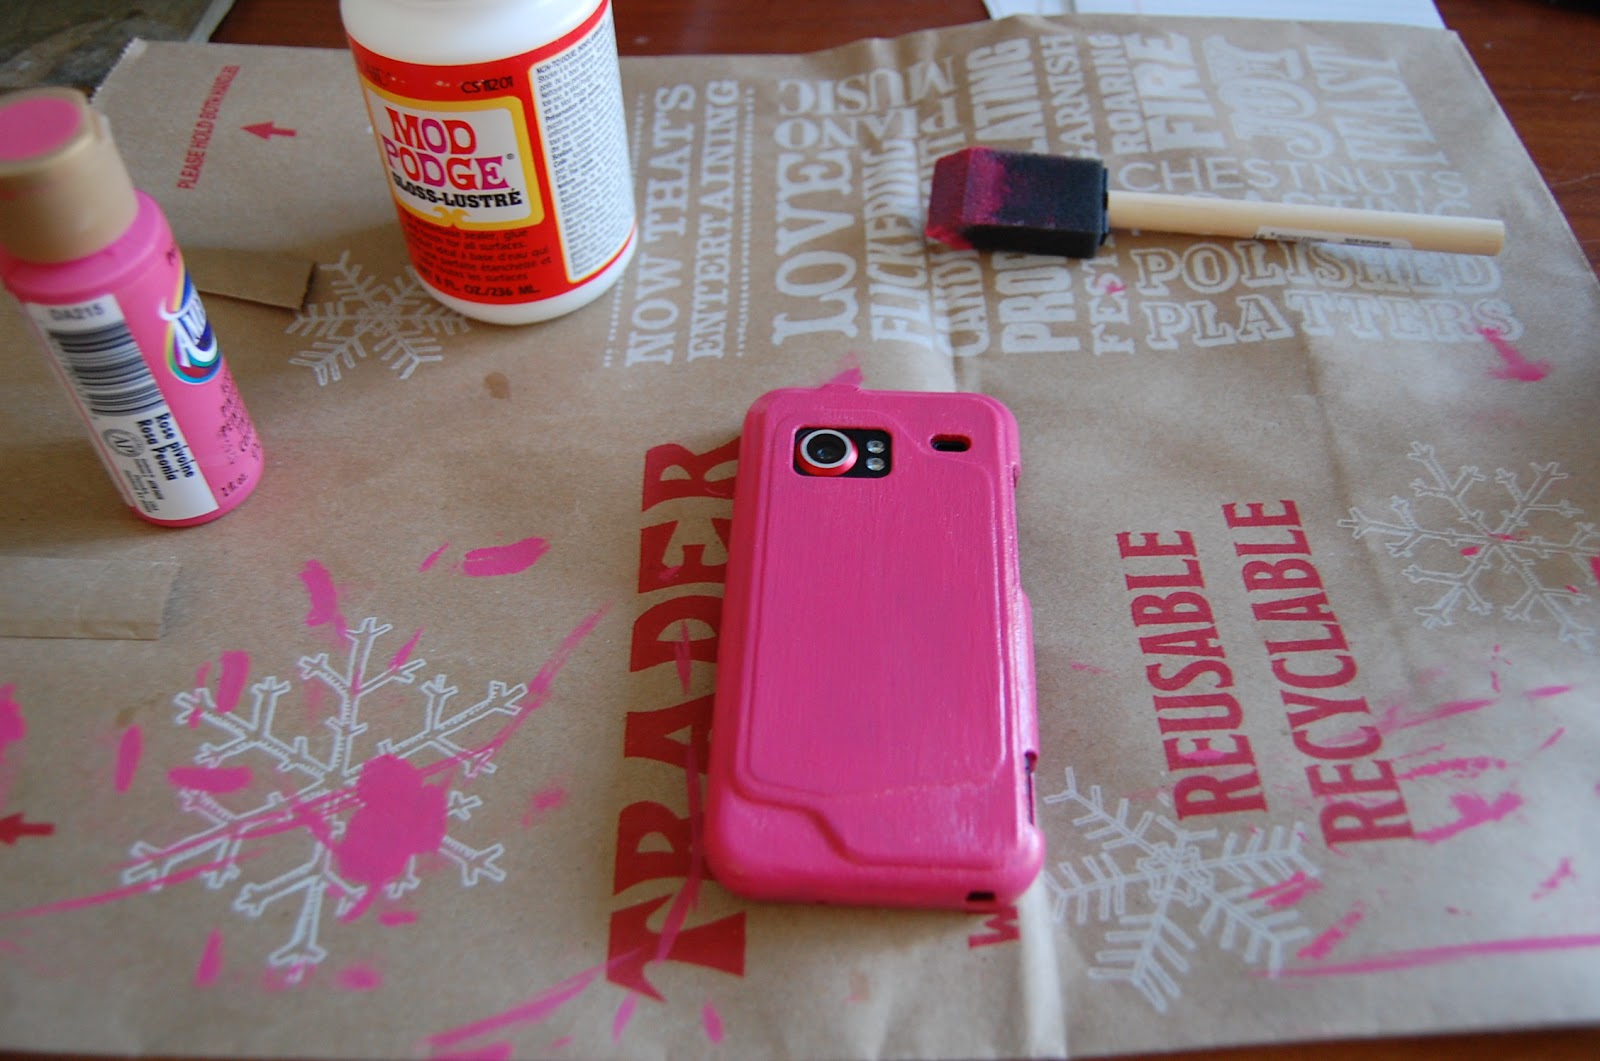
I've been searching for a pink case for my phone for quite some time now. Turns out, a hard case in the right shade of pink is hard to find. The other day I was walking around Michael's, I happened to pass by the acrylic paints and thought "I should just paint my case I have now!" (it was a translucent purple color). So I did. This color (Pink Peony) was named perfectly to my liking, and was the vision of pink I had in my head.

I'm not going to insult your intelligence by doing a step-by-step DIY, but essentially, I scuffed up the plastic with sandpaper, painted many many coats of the pink acrylic paint (letting it dry between each coat) and then covered it with gloss-finish Modge Podge (my crafty lover). Now, since doing this, and perhaps because I busted out the Modge Podge, I was thinking you could always stick a picture/stickers/perhaps even some lace, in between the last paint coat (applying while still tacky) and the Modge Podge. A bit of a decoupage, if you will. (I may have spent an entire summer doing this with magazines and small cardboard pencil boxes from my then employer, gifting them to friends before we all took off to college).

I did this while my husband was out, and when he came home he seemed a bit scared of my doings...however, I have to say, it's been 4 days now, and it hasn't chipped at all. I also haven't dropped it yet, so things may change if when that happens.

Monday, March 21, 2011

DIY: Lace trim tee for cheap!

A few weeks ago, I saw this post on one of my favorite blogs, Uber Chic for Cheap. This top on Blake Lively is too cute, and my crafty mind was kicked into full gear.

Cute, no?

This past week, I had my wisdom teeth removed and I was looking for something to do the day before my extraction to keep my mind off everything to come, and this seemed like an easy DIY to do just that. From start to finish, it took me about an hour to do, and the total cost of supplies was $3.49 for a yard of lace. I used a tee I had just hanging out in my dresser, and thread and needle from my sewing kit, which I feel is pretty standard in any household. This would have been so much quicker if I owned a sewing machine. (How I still don't own one is beyond me)


You could fold this over into the inside of the tee, and secure it that way, but my
skin is a little too sensitive for that.

I just today thought that a picture of this on would be helpful to see. But, you get
me in my yoga pants and without my slightly puffy post-extraction face.
You could sew random side pieces down to help the folding away. I may do this.
This tee was in my mind for another DIY involving my dear friend RIT dye, and now I'm wondering what would happen if I just tossed the whole thing into some anyway...but these are good colors for the Spring and Summer, so we may have to wait until the Fall.

Tuesday, March 15, 2011

DIY: Silver cleaning

I have lots of silver jewelry. It comes with the business, I guess you could say. But, I also have a lot of jewelry that once belonged to my great-grandmother (I call this my "archives"). Unfortunately over time silver blackens, I try to stay on top of cleanings, but I ran out of cleaner, and suddenly cleaning my pieces fell to the wayside. One day I decided enough was enough, I was going to find a cleaner that wasn't full of harsh chemicals (as part of my personal goals from my list) and potentially with something from my cabinets. Immediately, I figured there had to be some sort of baking soda paste I could make. I browsed the interwebs and found many homemade solutions. This was the one I went with, and I have to say, it worked great! I always get nervous with cleaning my vintage jewelry with stones, but having all natural ingredients kind of sets you at ease. Natural elements together can't possibly be bad, right?

So, here's what you'll need:
  • Boiling water
  • Glass baking dish (make sure the sides are tall enough to cover your jewelry)
  • Aluminum foil
  • Baking soda
  • Tongs (or something to remove the jewelry)
  • Dry cloth/Microfiber cleaning cloth
  • About 20-30 minutes depending on the amount of silver
(Click on pictures to enlarge)


(This should say Step 6. Sorry!)
 And there you have it. After I dried my goods, I used a microfiber cloth to clean them more and bring out the shine. If you're extra adventurous, you can even use a polishing adapter on the Dremmel and really pump up the shine. I did that on the cuff with the pinkish stone on it.

Voila!

Thursday, March 3, 2011

Late to the party.

So apparently March is National Craft month. National Craft Month! Clearly I cannot look past this and just sit and observe. Craft is my thing. I want to actively participate!

So I don't have anything planned crafty for today since I'm just learning of this, but don't run away! I figure my first thing would share some of my favorite blogs/websites for handmade, lovely, design, DIY...well...lovelies.

  • Design Sponge This is a lovely collection for design, be it interiors (I love the Before/After features) or refurbished items, DIY, you name it. Sometimes it gets backed up in my reader but even just flipping through and looking at the pictures is inspiring enough.
  • Poppytalk Similar to Design Sponge, Poppytalk covers all areas. I love the photography, the Indie Shop of the day feature (on the sidebar) and just so much about this site. Another one where even the pictures get your gears grinding.
  • Oh, hello friend I strive to have the cohesion she has on her blog. Photography, products, a monthly desktop calendar wallpaper, and she just had the most whimsical handmade/vintage wedding. Also, a fellow Etsian with a lovely shop to boot!
  • Lillyella Another Etsian with an amazing blog. Fashion, DIY, interviews with other artists, and recipes! Another website that also had a gorgeous DIY wedding. I wish these blogs were around when I was planning!
  • Amber's Notebook Fashion, DIY and other lovely finds. Amber's DIY's from earrings, to themed parties, to even Lady Gaga costumes she's so creative! (Not to mention that I wouldn't mind having her closet to go through!)
  • Prim and Propah a new little blog that will certainly be going places. Amanda just embarked on Pattern Project 2011 and I can't wait to see the outcome. AND she has a love for all things BravoTV and lets me tweet up a storm to her, which shows she's a kind and patient person who's not afraid to call me out for my flare for the dramatic.
There's so many other blogs out there that I stop by, but these are the ones I have in my reader and look forward to reading. I'm hoping to soon have some crafty goodness for you, my DIY list is plenty long and my head is swimming with ideas. Craft month is going to be awesome.

Any crafts planned? Any crafty blogs you love? Any crafty things you'd like to see here?

Monday, January 31, 2011

DIY Jewelry Frame

Goodness, I'm sorry this is so late! I made this back in November and never got around to sharing it with you! Here's a jewelry display I made in hopes of better organizing my jewelry. I have a lot and it for a long time just gathered, messily, on my nightstand. The last picture, of the display in action, shows how neatly, my jewelry is currently being stored. Although, I'm already thinking of ways to improve it! I would like to point out that the total cost for all the supplies was under $30. (Click any picture to view larger)


Note: Glazier points are in the framing section of Michaels, or a home improvement store, the correct push tool could also be found here. The perforated sheet metal was in an obsolete corner of Home Depot. The sheet was 17x(something) and I could easily make another with the leftover scrap. Or even 2 smaller ones, of 4 teeny tiny ones...you get the point.


Introducing: Help from husband. I could have done this, but I had a shoulder injury at the time. It's not about brawn for this step...(I didn't want you all thinking I had man hands)
Please Note: There's a push tool that you can use (a framing specific tool) but ours is in "storage" at the moment. (By "storage" I mean my grandparents basement. Just like when I say "Laundry" I mean my parents house. Apartment living is so restrictive!)

Voila! The finished product in full use. It's made getting dressed in the morning so much easier since I'm not digging around trying to find an earrings mate!

Tuesday, November 30, 2010

Faux-hem. How-to.

I'm short. Like 5'4" if I haven't just come out of the dryer, short. So pants, jeans especially, can run long on me. As a wee one, I embrace heels. I love heels. But sometimes, a girl just wants the comfort of flats. I'm anti going anywhere but the gym when it comes to athletic sneakers, and I think the times friends of mine have seen me outside a workout situation in my sneaks is all of 2 times. I moved in flip flops. I'm that anti-sneaker. So sometimes my jeans run long, and I want to wear flats, and until just last spring, I just dealt with it. I let my jeans get walked on, which always ends up with ratty, torn, jean bottoms. Nothing ruins a pair faster. I would sometimes tuck my jeans under, but then you lose the hem stitch, and it can look a little funny. I've seen contraptions to work on your hems and shorten them, but again, you mostly lose the hem, or you have some flourescent, bedazzeled device hanging out at your hem and that's just not me. After googling "faux hem", "fake hem", "shorten your jeans keep the hem", and about a dozen other phrases along those lines, I've seen my fair share of how-to's, video tutorials, and weirdo contraptions to use on your pants. I've finally found a way that works for me, and it's really quite simple. So here goes. 4 easy steps to faux-hem your jeans.

Okay, not so much a step, but as you see here...long jeans, flat shoes. Your shoes that you want to wear...you'll want those on. It will help dictate your length to faux-hem.

Then, cuff your pants to the length you want them to be. I do both legs at the same time, to help ensure they're even.

Then (and this is the tricky part but once you get the hang of it, you're golden) hold onto the hem of your jeans and tuck the cuff underneath into your leg.

Viola! Adjust hem, bunching as needed. You can see here in the close up a little fold line, but once you stand up, it's really hard to notice. And the closer the fold is to the hem, the harder it is to see even close up. (As seen with the back part of the leg in this shot).

Optional: Use a safety pin or a regualr pin to pin the inside to hold it more secure. Just be sure to hide the pins as well. I haven't had any issues with my jeans coming undone. I think if I was doing this with a pair of dress pants, I may want to use some pins to hold them.

Easy peasy. Now you'll be able to wear your favortie jeans with heels or flats. And if you're doing the 30 for 30 challenge, you may be able to squeak out a few more outfits with this little trick.